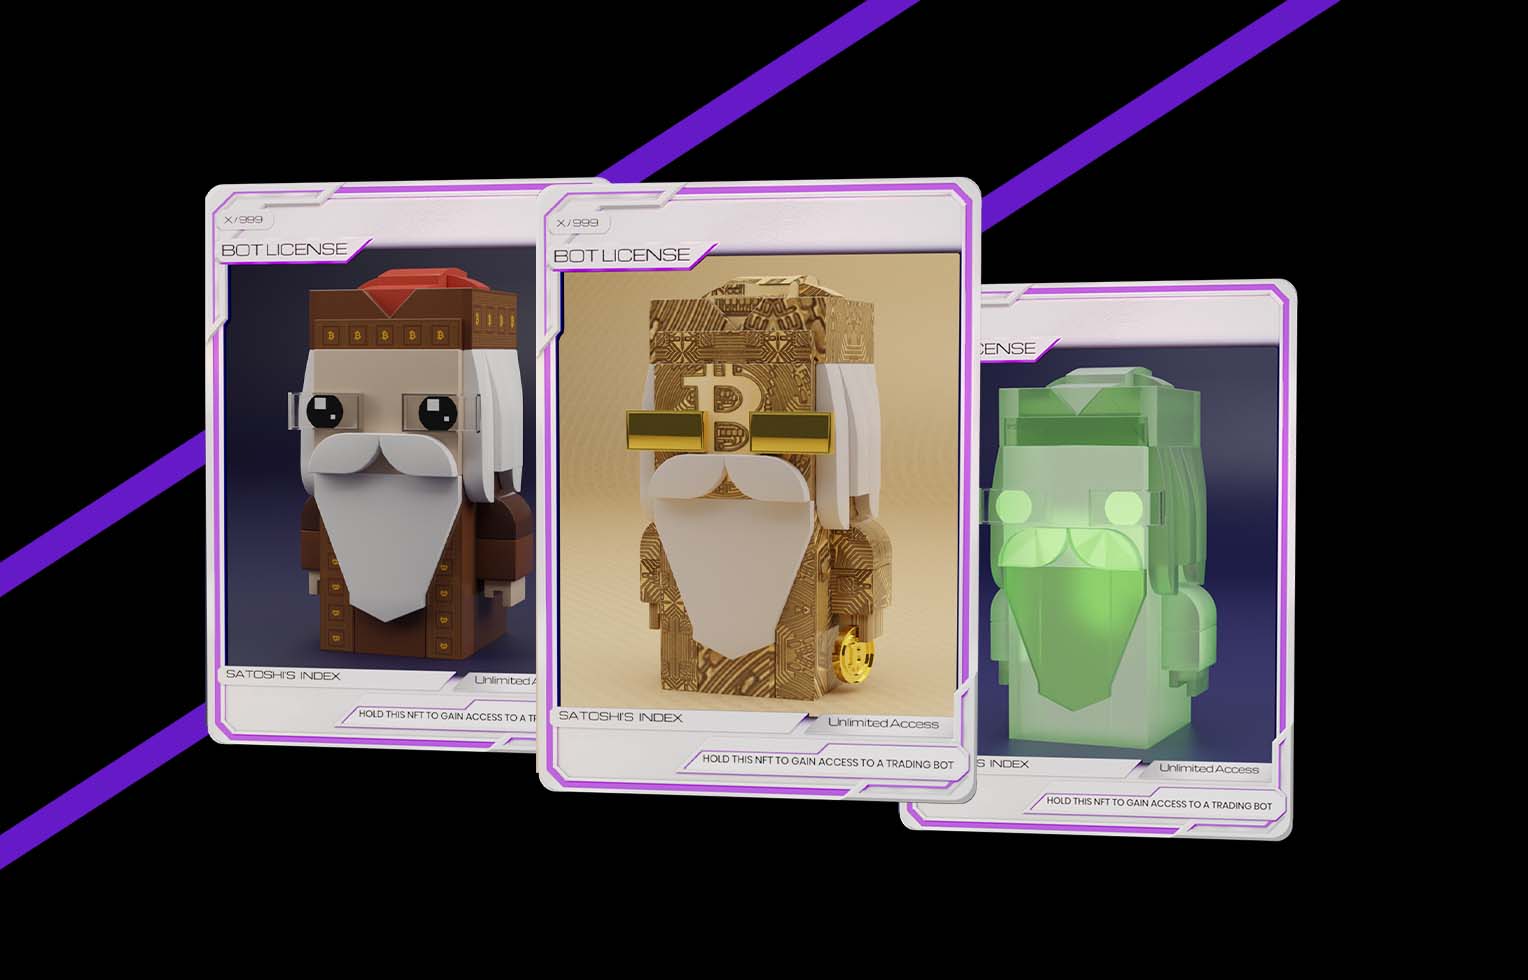
If you’ve reading this article, chances are you’re either new to the world of Crypto and NFT’s or you’re just searching for a quick refresher on how to get started. In this article, I’ll give you an overview of some of the basic steps required to get yourself set up for your first NFT purchase. This won’t be an exhaustive guide by any means, but my hope is by the time you finish reading this, you’ll have the basic knowledge required to mint an NFT. My team and I have been hard at work getting everything buttoned up for a February launch of our very first NFT collection, Satoshi’s Index. We hope you’ll use your new found skills to mint your very own Satoshi NFT once they go on sale in early Feb.
Now, let’s dive into everything you need to know to get your hands on your Satoshi (or really any NFT).
1. PURCHASING CRYPTOCURRENCIES
There are thousands of Blockchains and cryptocurrencies. But Bitcoin and Ethereum are the largest, based on market capitalization. Satoshi’s Index is built on the Ethereum blockchain, which means you will need to purchase Ether (also known as ETH). The ETH in your digital wallet (more on that later) will be used in two ways: to buy your Satoshi NFT (or any NFT built on the Ethereum blockchain) and to cover the cost of the transaction, which is known as gas fees or just gas (more on gas later). There are many ways to purchase cryptocurrencies, but for ease of explanation, I will focus on Coinbase.
Set Up Your Coinbase Account
Coinbase is one of the most popular cryptocurrency exchanges, and it is the main one I personally use. You can download the Coinbase app on your mobile device or use their desktop experience. Once you have their app or their site open, you will need to go through KYC procedures (Know Your Customer)-basically how they verify your identity. Here is a bit of necessary jargon…while most of the cryptocurrency industry is designed to be decentralized, Coinbase is centralized and, therefore, must comply with government regulations. This requires users to complete KYC procedures. For full disclosure, you must be 18 years or older, you have to provide personal information (photo ID), last 4 digits of your social security number, and your bank account details. You can either connect Coinbase directly to your bank with your username and password OR you can give them your ACH and send funds to them without giving up your sensitive user information. Once your KYC requirements are complete, you can purchase cryptocurrency with your credit or debit cards (Visa or Mastercard) or by wiring funds with your bank account.
PLEASE NOTE: completing KYC requirements and funding Fiat (a fancy word for any government backed monetary system — US Dollars, Euros, etc.) onto the exchange can take several days. So make sure you do this step well in advance of the date you want to purchase any NFT! So if you want to be ready to purchase your Satoshi NFT, I would suggest getting setup as soon as possible.
Here is a graph showing the approximate times different kinds of funding of your cryptocurrencies will take:
If you need more help, here are some links that might come in handy:
- Follow this link for additional help with setting up a payment method on Coinbase.
- Browse their Help Center for additional assistance
- Check out this article for the basics on setting up your Coinbase account.
Buy Ether On Coinbase
Now that your account is fully set up and you have the ability to transfer Fiat in your local currency (via bank account, debit card, etc), you can exchange your fiat currency for any cryptocurrency that Coinbase supports. Since our NFT token is built on Ethereum, we will focus on Ether, but know that you can use these same steps to buy Bitcoin or many other cryptocurrencies, etc. An interesting component of crypto is that you can acquire it either fully or fractionally, meaning if you don’t want to purchase a full coin at its current price (as of the writing of this article 1 ETH is hovering right around $3,200 USD), then you can buy a piece of it (e.g., 0.5 ETH @ $1,600 USD)]. There is no right or wrong amount of any coin for you to have in your portfolio — BUT TO BE CLEAR only buy as much cryptocurrency which you are comfortable losing. The same is true for NTFs. These are VERY volatile markets and should be managed accordingly. That said, if you are going to buy our NFT or any other NFT, you must have enough ETH in your wallet (more on that below!) to cover the price of the NFT. You also must be prepared to cover the cost of transferring ETH from your Coinbase account to your wallet, as well as the transaction cost of purchasing your NFT (remember gas fees?). Therefore, buy more ETH than the exact price of your NFT in order to cover the transfer and transaction costs related to your NFT.
For example, if you want to buy [5] NFTs at a price of [0.01 ETH] each, you will need at least [0.05 ETH]. But to be certain you have adequate funds, you should consider purchasing [0.07] ETH to make sure you have [0.05] ETH left in your wallet after you pay for transfer and transaction costs related to your NFT purchase.
2. YOUR PERSONAL WALLET
Remember that wallet concept I introduced earlier? Now, it is time to get you one of those. This wallet (which is a non-custodial crypto wallet) is where YOU will hold any cryptocurrency you want to use to purchase NFTs, as well as where you store/display the NFTs you own.
Setting Up A Wallet And Transferring Funds
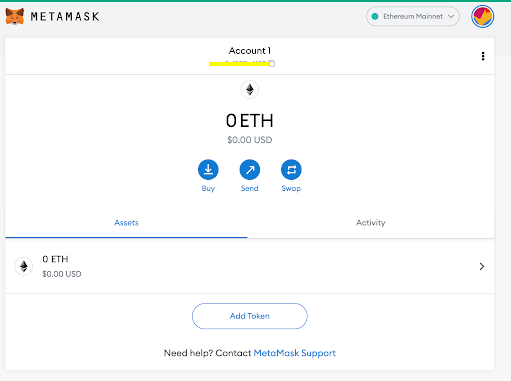
MetaMask is the main wallet I use. It is also the most popular web wallet, and you will need it to buy our NFT token. MetaMask is a preferred wallet on Ethereum-based NFT markets. You can use MetaMask’s mobile app or their desktop Chrome extension, however, I recommend the Chrome extension, as it makes the process much easier.
PLEASE NOTE. MetaMask is a non-custodial wallet, which means that you control your funds like the cash in your pocket, whereas Coinbase is a custodial cryptocurrency exchange that holds your funds for you, similar to your funds being held at a bank. This means that if you lose your login credentials for MetaMask, such as your password and Secret Recovery Phrase (“Secret Recovery Phrase” — random series of words in a specific order) you are potentially SOL. While MetaMask can help you recover a password to regain access, if you lose your seed phrase there is nothing anyone can do. So be extra careful with this information, you don’t want to lose it, but you also want to secure it so no one else can gain access to your funds or collections.
Follow the next steps to get your MetaMask set up:
- Go to Metamask.io website and click Download in top right corner.
- After arriving in the Chrome webstore, click Add Extension.
- Once downloaded, click Get Started.
- Then, click Create a Wallet on the next page. If you have an existing MetaMask account, you can import your existing wallet with your seed phrase, rather than creating a new one.
- Agree to the Terms & Conditions.
- Next, create a secure password; ideally, a combination of letters, numbers, and symbols or special characters that you will remember or that you can store in a secure place. We encourage you to write down your password and keep it safe.
- After you create your password, you will be guided to watch several videos to help you keep your funds and NFTs safe with your Secret Backup Phrase (sometimes called Seed Phrase or Secret Recovery Phrase). Please pay very close attention and make sure you fully understand.
- Next, you will click the screen to unlock your Secret Backup Phrase. This is a secret 12-word seed phrase that you can use to restore your wallet if you ever lose your password. DO NOT SHARE THIS WITH ANYONE. Write down your Secret Recovery Phrase in the exact order it appears and store it in the safest way you can find. NEVER store you wallet’s Secret Backup Phrase digitally. Never ever, EVER give your Secret Backup Phrase to anyone online or offline.
- On the next page, you will verify and confirm your Secret Backup Phrase in the exact order revealed in the step above. (*Note: We have intentionally redacted 10 of the 12 words below. When you reveal your Secret Backup Phrase, you will see 12 words; the grey “Redacted” box is our image edit. Although we only created this wallet for the purpose of this tutorial, and although there will never be any cryptocurrency in this wallet, we STRONGLY encourage wallet “hygiene” and want to lead by example. Never share your password or Secret Backup Phrase with anyone.)
- Once successful, click All Done and you will go to the homepage of your wallet.
- Next, click on the Extensions icon (appears as a puzzle icon) in the top right of Chrome
- Find MetaMask and click the Pin icon
- Now, your MetaMask will appear as a Fox icon adjacent to the search bar for easy use.

- When you click the Fox icon shown in the screenshot above, your MetaMask wallet will open as a popup over the webpage, shown below. Click the Fox icon in your Extensions bar whenever you want to login to your MetaMask wallet. Then, enter your password.

- If you forget your password, click “Import Using Secret Recovery Phrase” you can enter your Secret Recovery Phrase. Then, you enter your Secret Recovery Phrase, create a new password, and do try to remember your password this time ????
- Additionally, if you ever forget your seed phrase after you are logged in, click the circular icon at the top right of the MetaMask wallet popup.
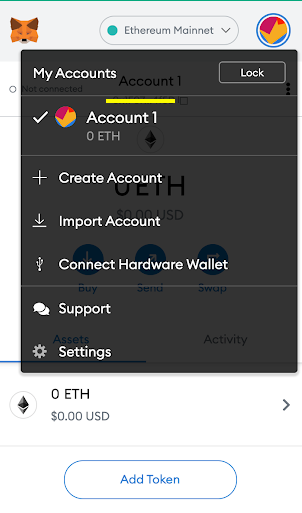
- Then, click Settings, click Security & Privacy, click “Reveal Secret Recovery Phrase”, enter your password, and find your seed phrase. Make sure to write these down. Best practice is NOT to save passwords or seed phrases on computers, phones, or any device that is connected to the internet. You may use a secure password manager service or other encrypted storage tools for your password but never for your seed phrase.
Moving ETH From Coinbase Account To MetaMask
Now that you have a Coinbase account, you can purchase ETH, AND have a personal MetaMask wallet — you can transfer your ETH from Coinbase to MetaMask. (Just remember, even though you can transfer Fiat to cryptocurrencies within Coinbase immediately, your funds will likely take 3–7 days before they are available to be transferred out of Coinbase into MetaMask.) Your wallet is what will allow you to interact with and buy on any NFT marketplace (OpenSea, Rarible… etc).
To move funds from Coinbase to MetaMask, open your MetaMask app and copy the long string of numbers and digits starting with “0x…” underneath your account name. This is your PUBLIC wallet address. To receive any cryptocurrencies on the Ethereum blockchain via your MetaMask account, use this address. Click the Paper stack icon next to your address to copy it to your clipboard.
Next, go to your Coinbase app (or similar centralized exchange) and open your wallet. Then view your Ethereum balance and click withdraw ETH. Next, enter your MetaMask public wallet address, which you copied to your clipboard in the step above. Your MetaMask wallet address is the “0x…” address you copied above; paste that into the “To” section below to send your ETH from Coinbase to MetaMask. (*Note: the Coinbase screenshot below is on desktop and may appear differently on mobile.).
Finally, confirm the transaction! Take note of your transaction ID, so that you can monitor the progress on www.Etherscan.io. Etherscan is a free website service that provides transparency into all transactions on Ethereum. Then, wait patiently for funds to arrive in your MetaMask wallet; this may take several minutes.
Remember, you will incur transaction fees (gas) when moving funds between your Coinbase wallet and MetaMask wallet, and buying NFTs, so make sure you have sufficient ETH to cover transaction fees, as gas fees fluctuate based on the current level of activity on the Ethereum blockchain.
3. How To Buy NFTs
Now that you’ve transferred ETH over to your Metamask Wallet, you are now in a position to buy, bid, or sell NFTs!! There are many marketplaces featuring different art, digital goods, etc. While I won’t detail them all here, you can explore and purchase many NFTs with your ETH. Some sites will have bidding mechanics, others will have straight buys. Either way you choose to purchase an NFT, the site will likely help walk you through the specific ways they integrate with your MetaMask wallet.
PLEASE NOTE. If a site asks for your Secret Recovery Phrase to authenticate your MetaMask, immediately exit whatever that is. Nothing and no one should know your Secret Recovery Phrase outside of yourself. Unfortunately, there are a lot of scammers out there that may try to take advantage of you, so be careful.
That’s it! You are now ready to buy an NFT. I hope you will use this newfound knowledge of yours to mint a Satoshis Index NFT